

The developing artist – from birth to five!
Being able to make marks on paper is a process of discovery that begins long before a child is able to hold a pencil. Art is a sensory experience, and from birth babies explore the environment with their senses. They build up a picture of their immediate world through textures, sights and sounds. At around one year old babies begin to notice that they can make marks with fingers in spilt milk or by pushing a spoon around the custard in their highchair tray. These marks are all about the movement of the body and will begin as accidental and become deliberate and repetitive. At this stage a baby will enjoy the movements that produce marks with a crayon on paper. Over time these marks will become more controlled. As speech develops, a toddler might see an accidental resemblance to something within their mark making and name it – ‘round’, ‘wheel’. They begin to realise they can represent things with their mark making: ‘They make something stand for something else’ (Matthews, p.9). With greater motor control the same image will be intentionally repeated to represent perhaps a person or a tree. These stages are not fixed or compartmentalised. It is much more helpful to see them as fluid and exploratory (Eglington).
Drawing activities
These activities are suggestions to dip into and mix together and some will overlap with other aspects of art. They are about experiences and may not always have an obvious end product. Having a camera on hand to record some of the process can serve as a useful reference for children, practitioners and parents.
 Mark Making
‘Notices and is interested in the effects of making movements which leave marks’, Development Matters in the EYFS, Expressive arts and design: Exploring and using media and materials, 16-26 months, p.43
Messy mark making – fill a builder’s tray with a corn flour and water mixture or shaving foam. Give the children time to explore the feel of these messy mixtures with their hands. Look at the marks that are left behind as they drag their fingers along the tray. Talk about the shapes they are making – lines, spirals, straight, round. Use big movements and small movements. Introduce objects other than fingers to make marks with – large combs, sticks, brushes – the children might have some good ideas.
 Messy mark making outside – fill a builder’s tray with soil and ask the children to add a bit of water to make mud. Or add some water to the sand tray. Have a go and making marks in these mixtures. Can the children find natural objects to make marks with – small sticks or stones.
Finger paints – use these thick paints in smaller individual trays and let the children explore running their hands through them to leave marks. They may want some large pieces of paper to sweep their finger-painted hands over, or make more delicate finger print marks. Lots of opportunity for language – thick, gloopy, circles, spirals, round, printing etc.
Water marks – collect some big decorating brushes and buckets of water and invite the children to make water marks on the pavement or a fence. They will be using big movements. Are their marks wavy or straight? There might be an opportunity to talk about stripes or dots, splashes and sprays.
Making tracks – try to get hold of an old car tire and bike wheel. Help the children fill a builder’s tray with water and then roll a tire through it and out onto the pavement. Again this involves lots of body movement from the children. Look at the tracks. Are some of the marks left by the wet wheels thick and some thin? Can they see any tire patterns in the marks? Are the lines straight or did the tire wobble and make a wavy line?
Painting tracks – the children might want to explore tires and mark making further. They could roll small world cars through paint and onto paper. Using different cars might produce thick and thin marks, patterns and curved or straight lines.
 Magic wax – invite the children to try using a candle a bit like a wax crayon on paper. Make some marks and patterns. Can they see the marks they have made? Show them how to use watery paint to paint over the wax on the paper and reveal their marks. They might like to think of it as making marks for a secret code or a magic trick.
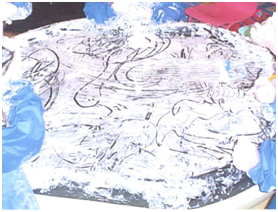
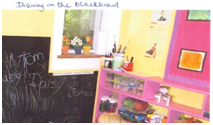 Chalk and charcoal– use chalk on black paper and charcoal on white paper. Smudge them with fingers or cotton wool. Draw on a big blackboard. Crush chalk and mix it with water to make a sort of paste and make marks with that on black paper. Take chalks outside to draw on pavements or fences.
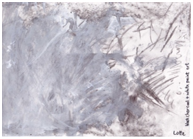
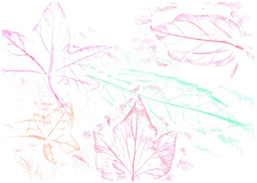
Rubbings – collect keys, coins, leaves. Use crayons to make rubbings through paper. Look at the markings of the objects they have rubbed. The children might like to explore whether other media works as well for rubbing – pencils, chalk etc. They might be able to say why other media doesn’t work so well – ‘too smudgy’, ‘too hard’ etc.
Easels – use easels inside or out for making marks with paint, pastels, charcoal, chalk. Add brushes of different thicknesses, rollers, sponges for applying paint or smudging pastels.
Music – listen to different types of music over a few days. Talk together about what the music makes you want to do – dance, jump, run, sing, relax. Do all of these things to the music. Talk about how fast or slow the types of music are. Do they make the children feel happy or sad? Have a go at making marks to the music. What kind of marks do they use for fast music/slow music, sad music/happy music etc. They could do this on individual paper, or together on a large roll of paper. The children could extend this by exploring other feelings – anger, excitement, or by thinking about happy and sad colours (Eglington).
Line and pattern
‘Provide children with opportunities to use their skills and explore concepts and ideas through their representations.’ Development Matters in the EYFS, Expressive arts and design: Exploring and using media and materials, 40-60+ months, p.44
Go on a line walk – take the camera and look for lines in the natural and constructed environment – lines between paving slabs, the lines of wood on a fence, electricity cables, branches, the veins on a leaf, stems, sticks etc. Talk about how lines can be wavy or straight, thick or thin.
Natural lines - collect some of the natural lines – sticks, stems, branches. Look at them closely with magnifying glasses. Lay them in lines, sequence them, make patterns.
Lines outside – draw wavy and straight and curved lines in chalk, water and brushes, wet sand, mud and in the air.
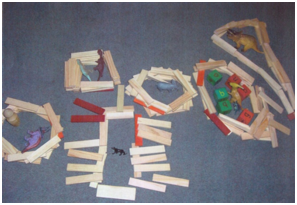 Line things up – some children might want to explore making lines out of just about anything. They may be doing this as part of a trajectory schema. Find lots of interesting things to line up – pebbles, cars, play mobile figures, small world animals, wooden blocks.
Body lines – can the children make their bodies into a straight line or a curved line? Look at the lines of their arms, legs and fingers. All lie down together in a long straight line. How could they make this long body line wavy or curved, or even zigzagged? Look at the lines on your hand.
Thick and thin – explore thicknesses of lines using a variety of media – thin pencils, thick felt tip pens, biros, charcoal, decorating brushes, fine brushes. The children might come up with their own ideas. Use large and small paper.
All change! – have fun outside with chalk or water and brushes. Invite the children to start a line and listen out for you, or one of them, to call ‘All Change!’ Now they have to change the direction of their line. Repeat this a few times. Then look at the lines and patterns that have been made. There might be lots of criss-crossing. Are there shapes made by these over-lappings? If the children used chalk they might like to find a shape and shade it in.
 ICT lines – use a drawing program on the computer and invite the children to draw lines using the computer mouse. Talk with them about the different lines they can make – straight, wiggly, zigzag etc.
Animal patterns – look at pictures of wild animals. Talk about the patterns on their fur – spots, dots, stripes. 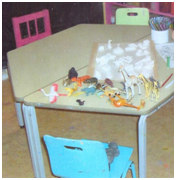 Collect some small world animals and look at their patterns. Why do the animals have these patterns? Invite the children to have a go at reproducing some of the patterns. Support them in choosing the paper type and colour and the art media they use.
Line stories – use a long roll of paper. Ask the children to choose something to draw lines with. Invite them to draw long lines along the paper. Does their line loop or zigzag, go up or down, change direction? Can they tell a story about their line? Where is it going?
Ladders – some children might like to take a photo of the climbing frame ladder, a wooden step ladder, and collect small world ladders in the nursery. Talk with them about the lines on ladders, up and down and across, vertical and horizontal. They might like to have a go at drawing ladders.
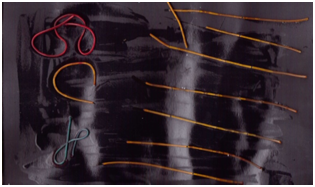 Spaghetti lines – spaghetti is good for straight lines uncooked, but it is especially wiggly when it is cooked. You could add food colouring to the water to make it a colour. Lay it out in trays or on paper to make all sorts of lines.
Enclosed Shapes
‘Understands that they can use lines to enclose a space, and then begin to use these shapes to represent objects.’ Development Matters in the EYFS, Expressive arts and design: Exploring and using media and materials, 30-50 months, p.44
Think Big – use big movements to draw shapes in the air, wet sand, with paint brushes and water outside, or with chalk on a big blackboard. Circles are a good shape to start with. Talk with the children about the shapes they are making – are they smooth, pointy, sharp?
Shape Search – ask the children to choose a shape to look for. Invite them to help you find as many things that are that shape as they can. Take the camera – there might be a square cloud or triangular branch to photograph. The children might like to have clipboards and pencils to draw the shapes they see.
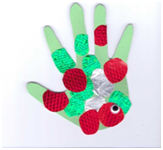 Hands – the children might like to draw round their hands. Cut around the outline and decorate with collage materials, or show them how to overlap their hand outlines to make interesting shapes.
The shape game – show the children how to play the game where one of you draws a shape and the other has to turn it into something – e.g. a circle turned into a lollipop or a wiggly shape turned into a snake.
 Shape patterns – use flat plastic shapes to draw round. The children might like to draw round the same shape repeatedly to make an overlapping pattern. The children could put the plastic shapes together to make something else – a circle with a rectangle underneath to be a tree, or a square with a triangle on the top to be a house.
Shape collage – use sticky shapes and shapes cut from different paper and materials to make pictures. 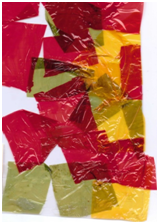
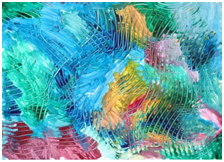
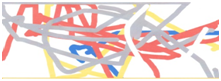
Famous Artists – Piet Mondrian, Wassily Kandinsky and Henri Matisse all used shape in different ways in their art work.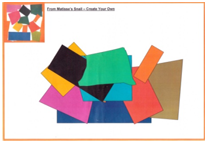 A Mondrian picture could be used with children who are interested in lines and shapes and crisscrossing. They could use black felt tips to make their own bold, black criss-crossed lines. Children who are enjoying the shape game and patterns may be inspired by a Kandinsky. Children who are using shapes to make other things, or are interested in lining things up or in spirals could look at some of Matisse’s collage work.
Observational Drawing
‘Create simple representations of events, people and objects’ Development Matters in the EYFS, Expressive arts and design: Being Imaginative, 40-60+ months, p.46
 Here are just some of the objects young children might like to explore and draw: feathers, flowers, seeds and seed pods, wheels, cobwebs on a dewy morning, fruit cut open to reveal the seeds, windows, old radios and other machines, tadpoles, their own hands and faces.
Remember to have mirrors and magnifying glasses available and to talk about looking closely at tiny details. Try to find new and interesting ways of accessing observational drawing with young children. For example, doing lots of movement with arm, legs, fingers and toes before beginning to draw their bodies (Eglington), or cutting up fruit, looking at it with magnifying glasses and eating it before drawing it.
Drawing Resources
Below is a selection of possible resources for Drawing, but this is not a definitive list:
Chalk, pastels, charcoal, soft graphite pencils, crayons, water colour paints, thin brushes, thick brushes, decorating paint brushes, felt tips of different thicknesses, biros, collection of short sticks for use outside in mud and sand, combs, rollers, finger paints, corn flour, paper of different thicknesses/sizes/colours/shapes, rolls of paper, books with images by artists or interesting pictures and illustrations, mirrors, magnifying glasses, cameras.
References
Art and Design Resource File, Jill Painter and John Thirlwall, LCP, Warwickshire, 2006
Helping Children to Draw and Paint in Early Childhood, John Matthews, Hodder and Stoughton, 1994
Art in the Early Years, Kristen Ali Eglinton, Routledge Falmer, 2003
Preschool Art, Mary Ann Kohl, Brilliant Publications, 1999
Art 4-11, ed. Margaret Morgan, Simon and Schuster, 1991
Recommended Comments
There are no comments to display.